Quickstart
Your first playable Sandbox game in five minutes: pick a starting map, cast a character, place the props, write one rule, test in the browser and publish.
This guide takes you from an empty tab to a playable, then published, game. No account, no install: the studio runs in the browser and saves your project as you go. Allow five minutes, about one per step.
Before you start
The whole path
The studio always follows the same path: Map → Cast → Build → Rules → Test → Publish. It is in the top bar, with a Next button that moves you along one step at a time.
Choose a world
Go to /studio. Three cards offer three ways in. For this guide, take Start from a map: pick the Island thumbnail, then the Explore mode. You land in a world with its terrain, its sky and its sea, on the Map step.
In a hurry? Start from a game opens one of the nine complete games instead, already playable: you can jump straight to Test, then come back to reshape it. The eight maps are described in The six steps.
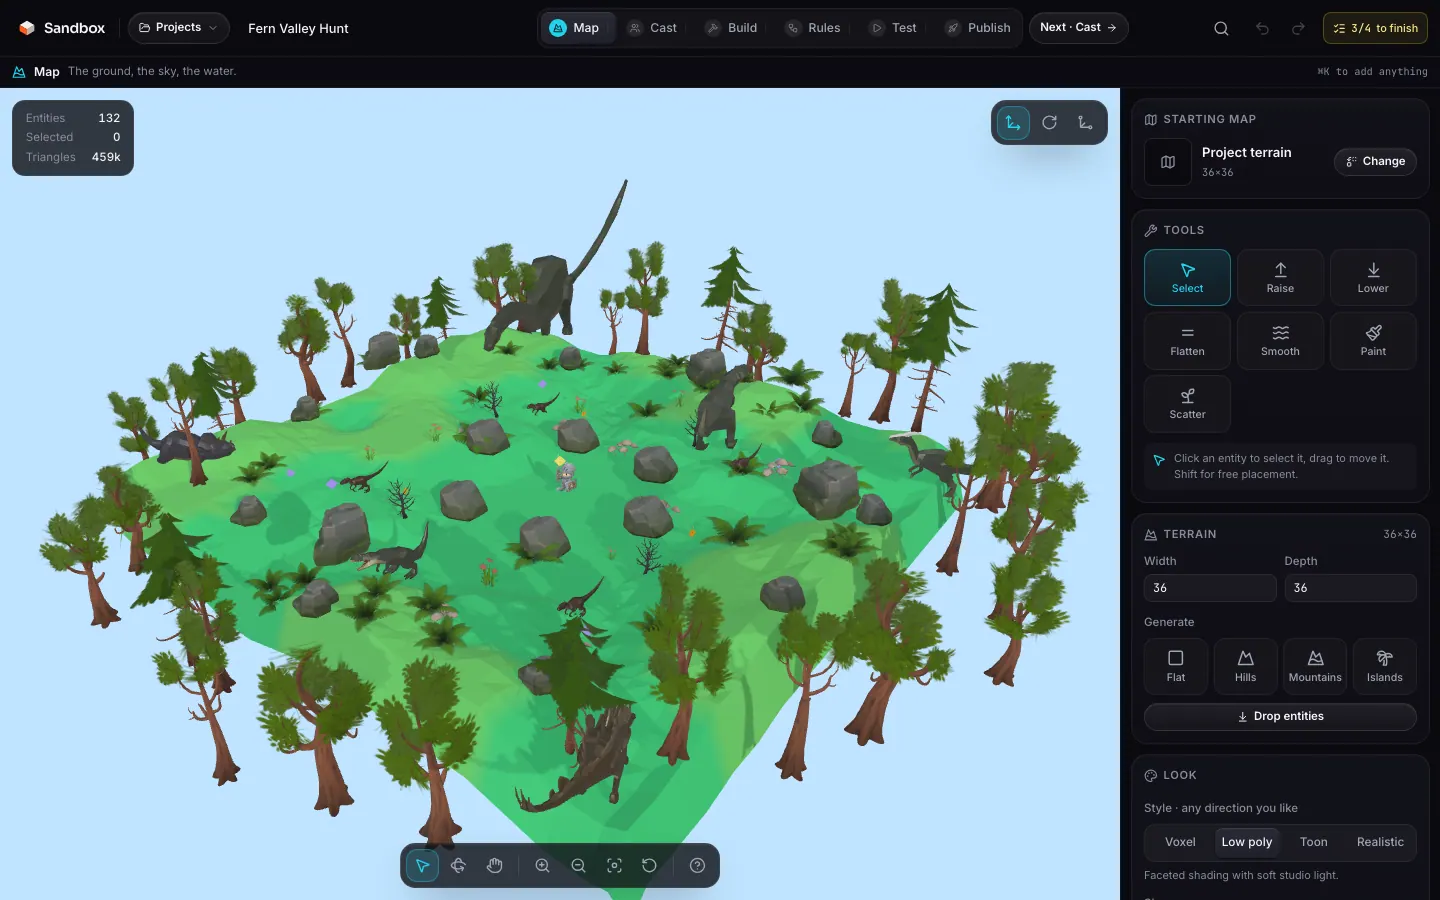
The Map step: the starting map, the terrain brushes and the look. Sculpt if you feel like it: Raise, Lower and Paint are brushes you drag straight over the terrain. Otherwise move on: the map is already fine.
Cast the characters
Click Next · Cast. The panel reads as four groups: Player, Enemies, NPCs, Spawners. Click Pick a character: a browser shows the library’s animated characters and creatures. Take one — it becomes the player’s avatar and where the game begins.
In the NPCs group, click Add an NPC and pick another character. It lands on the map, and placing stays armed: every click on the ground adds one more. Type what it says in the What it says field of its row — the player will read it by pressing E.
A row’s settings apply to every copy in it. Three NPCs of the same model say the same thing, and changing their text changes all three at once.Place the props
On the Build step, open the library or press ⌘K and type what you are after, say “tree”. Enter adds the asset to the project and arms the map: every click on the ground puts one down. In the Tools section, the Place tool lets you choose the role of what you place: take Coin and sow a dozen coins to collect.
With the Select tool, click an entity to pick it and drag to move it. W E R switch the gizmo between move, rotate and scale.
Write one rule
On the Rules step, Rules section, click New rule: When “Score reaches” 50, Then “Show a message”. A rule reads like a sentence: an event, optional conditions on variables, then actions.
The Game section of the same page carries the mode and its settings: how many coins finish the game, the time limit, gravity, jump height.
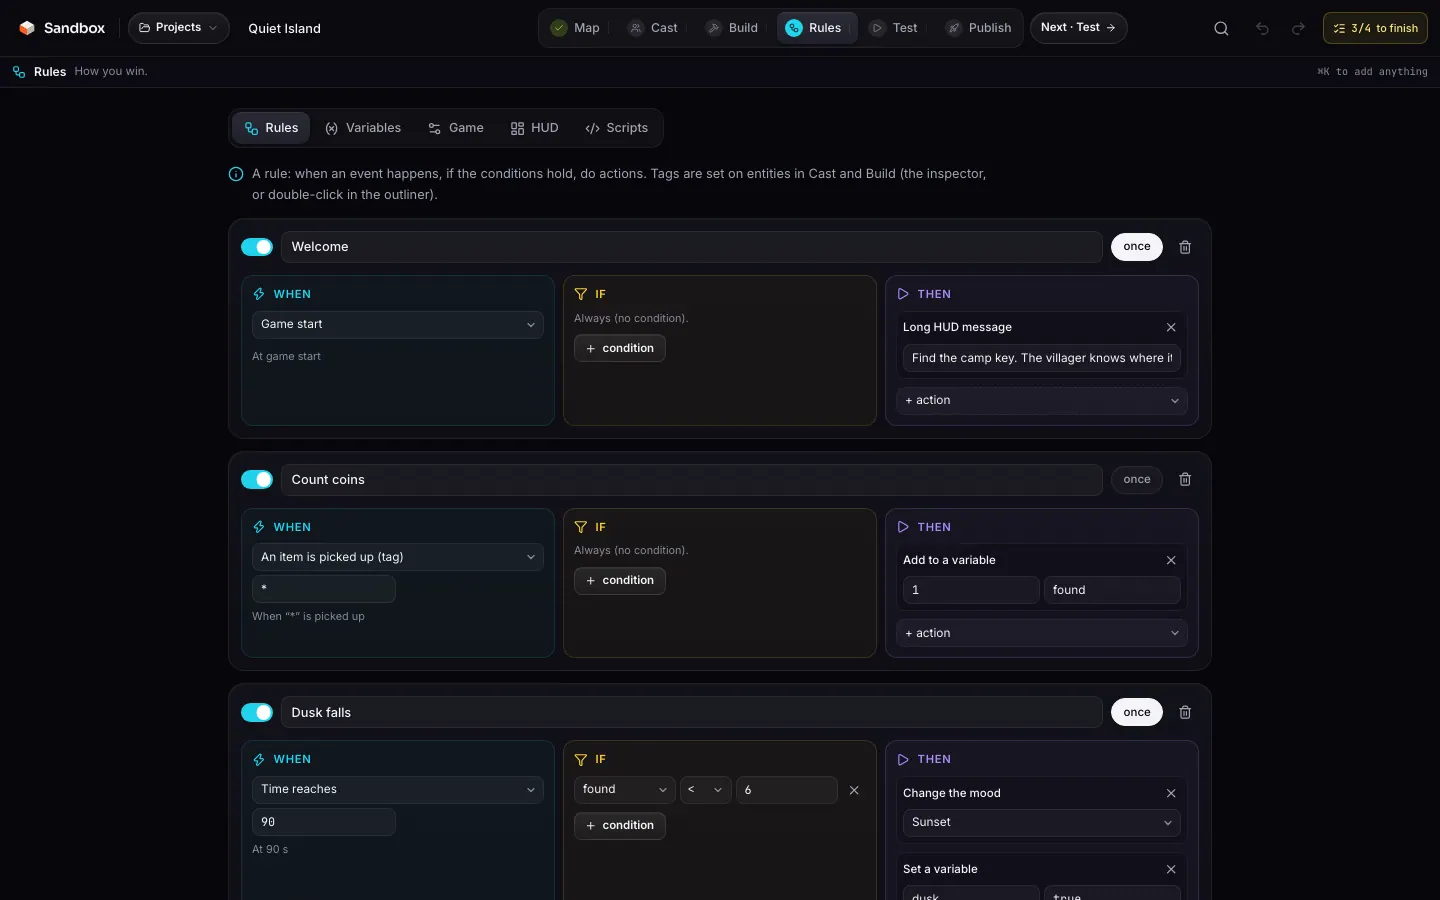
Every rule: When, If, Then. Test
On the Test step, the game starts with the same runtime players get. The Restart button runs a fresh round from your latest version. Go back to Cast or Build to fix things, then test again — this is the round trip you will make most often.
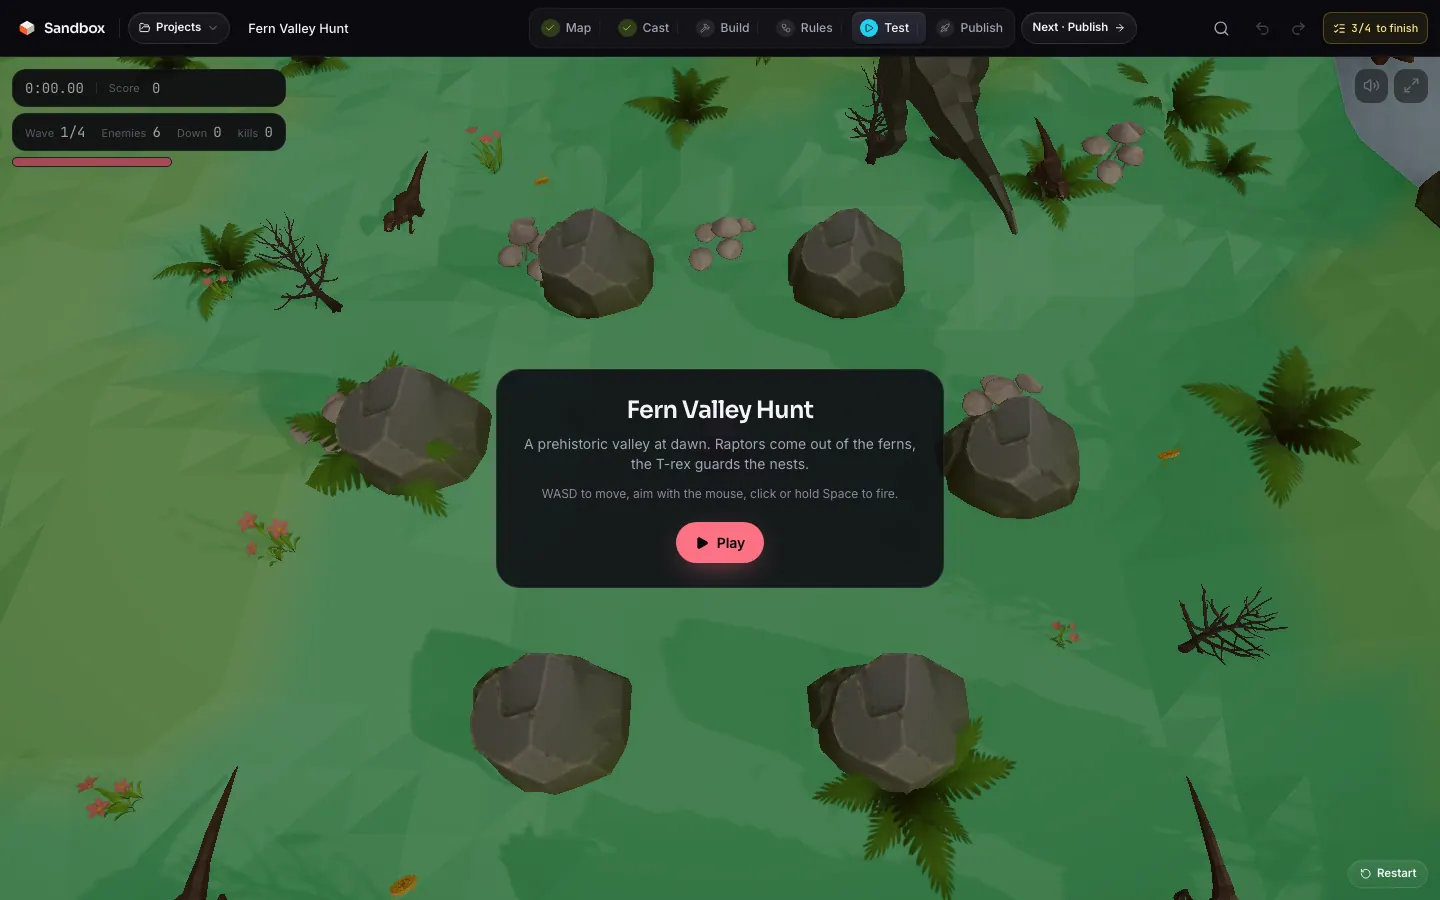
The Test step runs the real runtime. Publish
On the Publish step, give a title and a description, then click Capture from the game for the 1280×720 cover (or upload a PNG). When the What’s missing list reads 4/4, connect a wallet and click Publish.
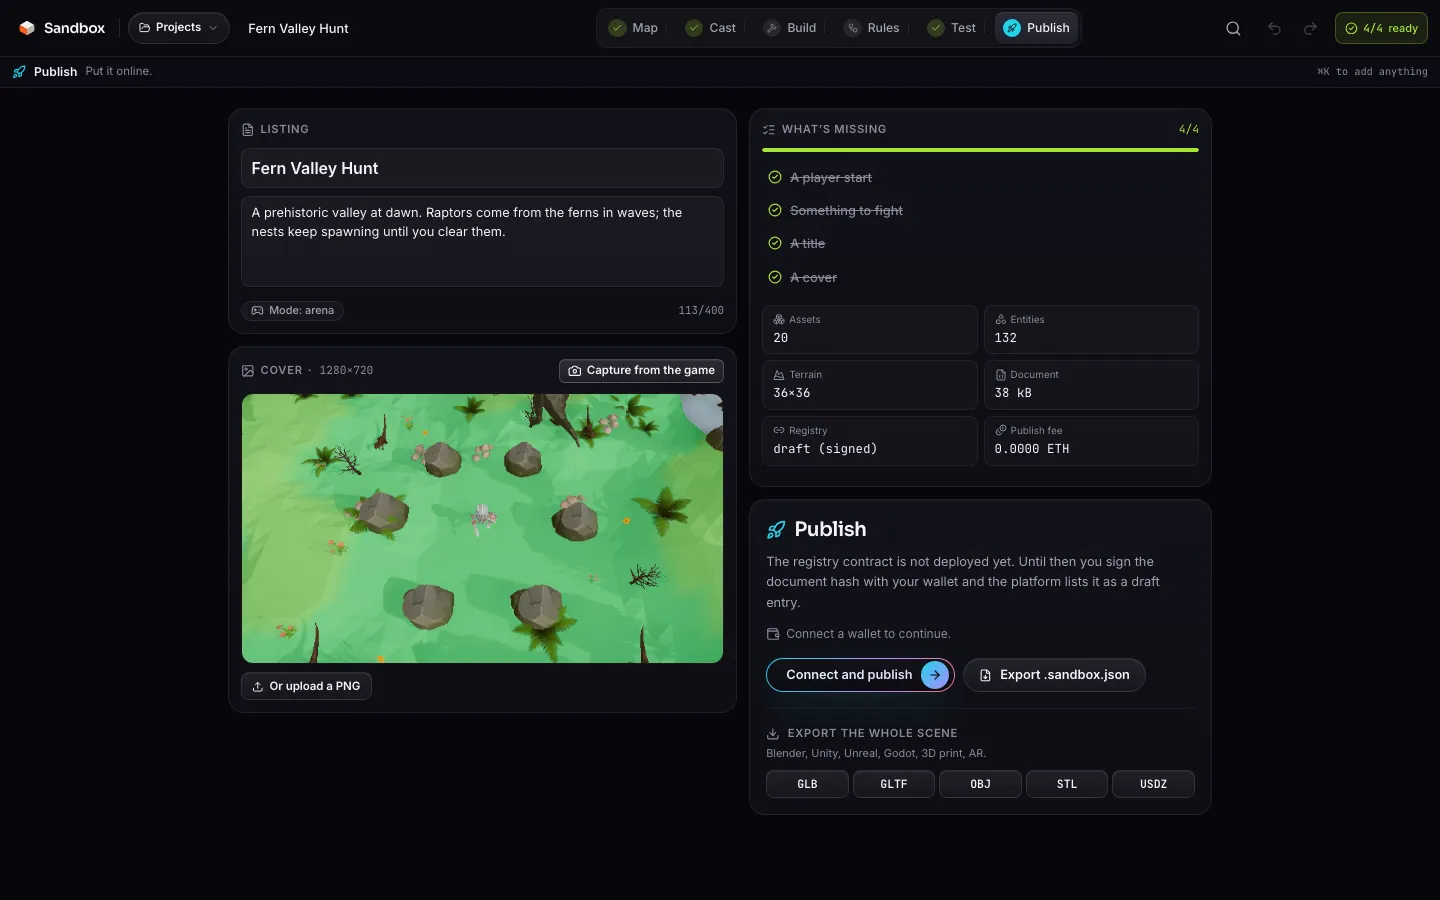
Listing, cover, what’s missing and publishing.
What’s missing
The chip in the top bar counts four things and nothing else, and the Publish button stays disabled until they are all done. Click a line: the studio takes you to the step that fixes it.
| Item | Step | How to fix it |
|---|---|---|
| A player start | Cast | Pick a character: it becomes the avatar and where the game begins. |
| An objective for the mode | Build | Whatever the mode expects: a finish or checkpoints in race, something to fight in arena, coins or NPCs in explore… |
| A title | Publish | Fill in the Title field (64 characters max); “Untitled” does not count. |
| A cover | Publish | Capture it from the game or upload a PNG. |
The server validates the document again when you publish. All about publishing.
Draft registry
$SANDBOX token launches, publishing will require holding 1,000 tokens.Which mode to choose
The mode provides the controller, the camera and the win condition. You pick it on the way into the studio, and you can change it later in the Game section of the Rules step: the terrain and entities stay in place.
| Mode | ID | For |
|---|---|---|
| Race | race | Karts, checkpoints, laps and drift. Bots follow your checkpoint line. |
| Platformer | platformer | Run, jump, collect coins, dodge hazards, reach the finish. |
| Arena | arena | Top-down waves of enemies. Survive, shoot, score. |
| Runner | runner | Endless lanes, obstacles and coins, ever faster. |
| Explore | explore | A world to walk through. Collect what you placed, talk to signs, no fail state. |
| Capture the flag | ctf | Two teams, two bases, one flag each. Bring theirs home, keep yours. |
| Tower defense | tower | Waves walk the waypoints toward your base. Build turrets on the way. |
Where your work is saved
Autosave
A project is written to this browser’s localStorage as soon as it is created, then on every change, about a second after your last action. CtrlS (⌘S on Mac) forces a save. The indicator next to the title reads “saved” or “unsaved”.
Back up or move a project
The Export .sandbox.json button — in the Projects menu or on the Publish step — downloads the full document. To reopen it, elsewhere or later, use Import on the studio’s entry screen.